
Testa Wetail Shipping riskfritt!
Modern frakttjänst. Designad för WooCommerce.
How to install Visma for WooCommerce
This process is described in more detail in step 4 below in the Connecting with Visma section. Please note that a response from Visma must be awaited (usually takes a maximum of one working day) before you can log in. Also check that you have Visma’s integration module activated, which you do according to the following instructions.
Step by step guide:
Install the integration that you either download here or via your WordPress admin panel. Note that our integration for Visma eEkonomi is developed and adapted for the Swedish market. Other markets may need adaptation, which is ordered via [email protected]
You should have already received an API key from us via email, if you haven’t, contact our support at https://wetail.io/support.
1. Connect WooCommerce with Visma
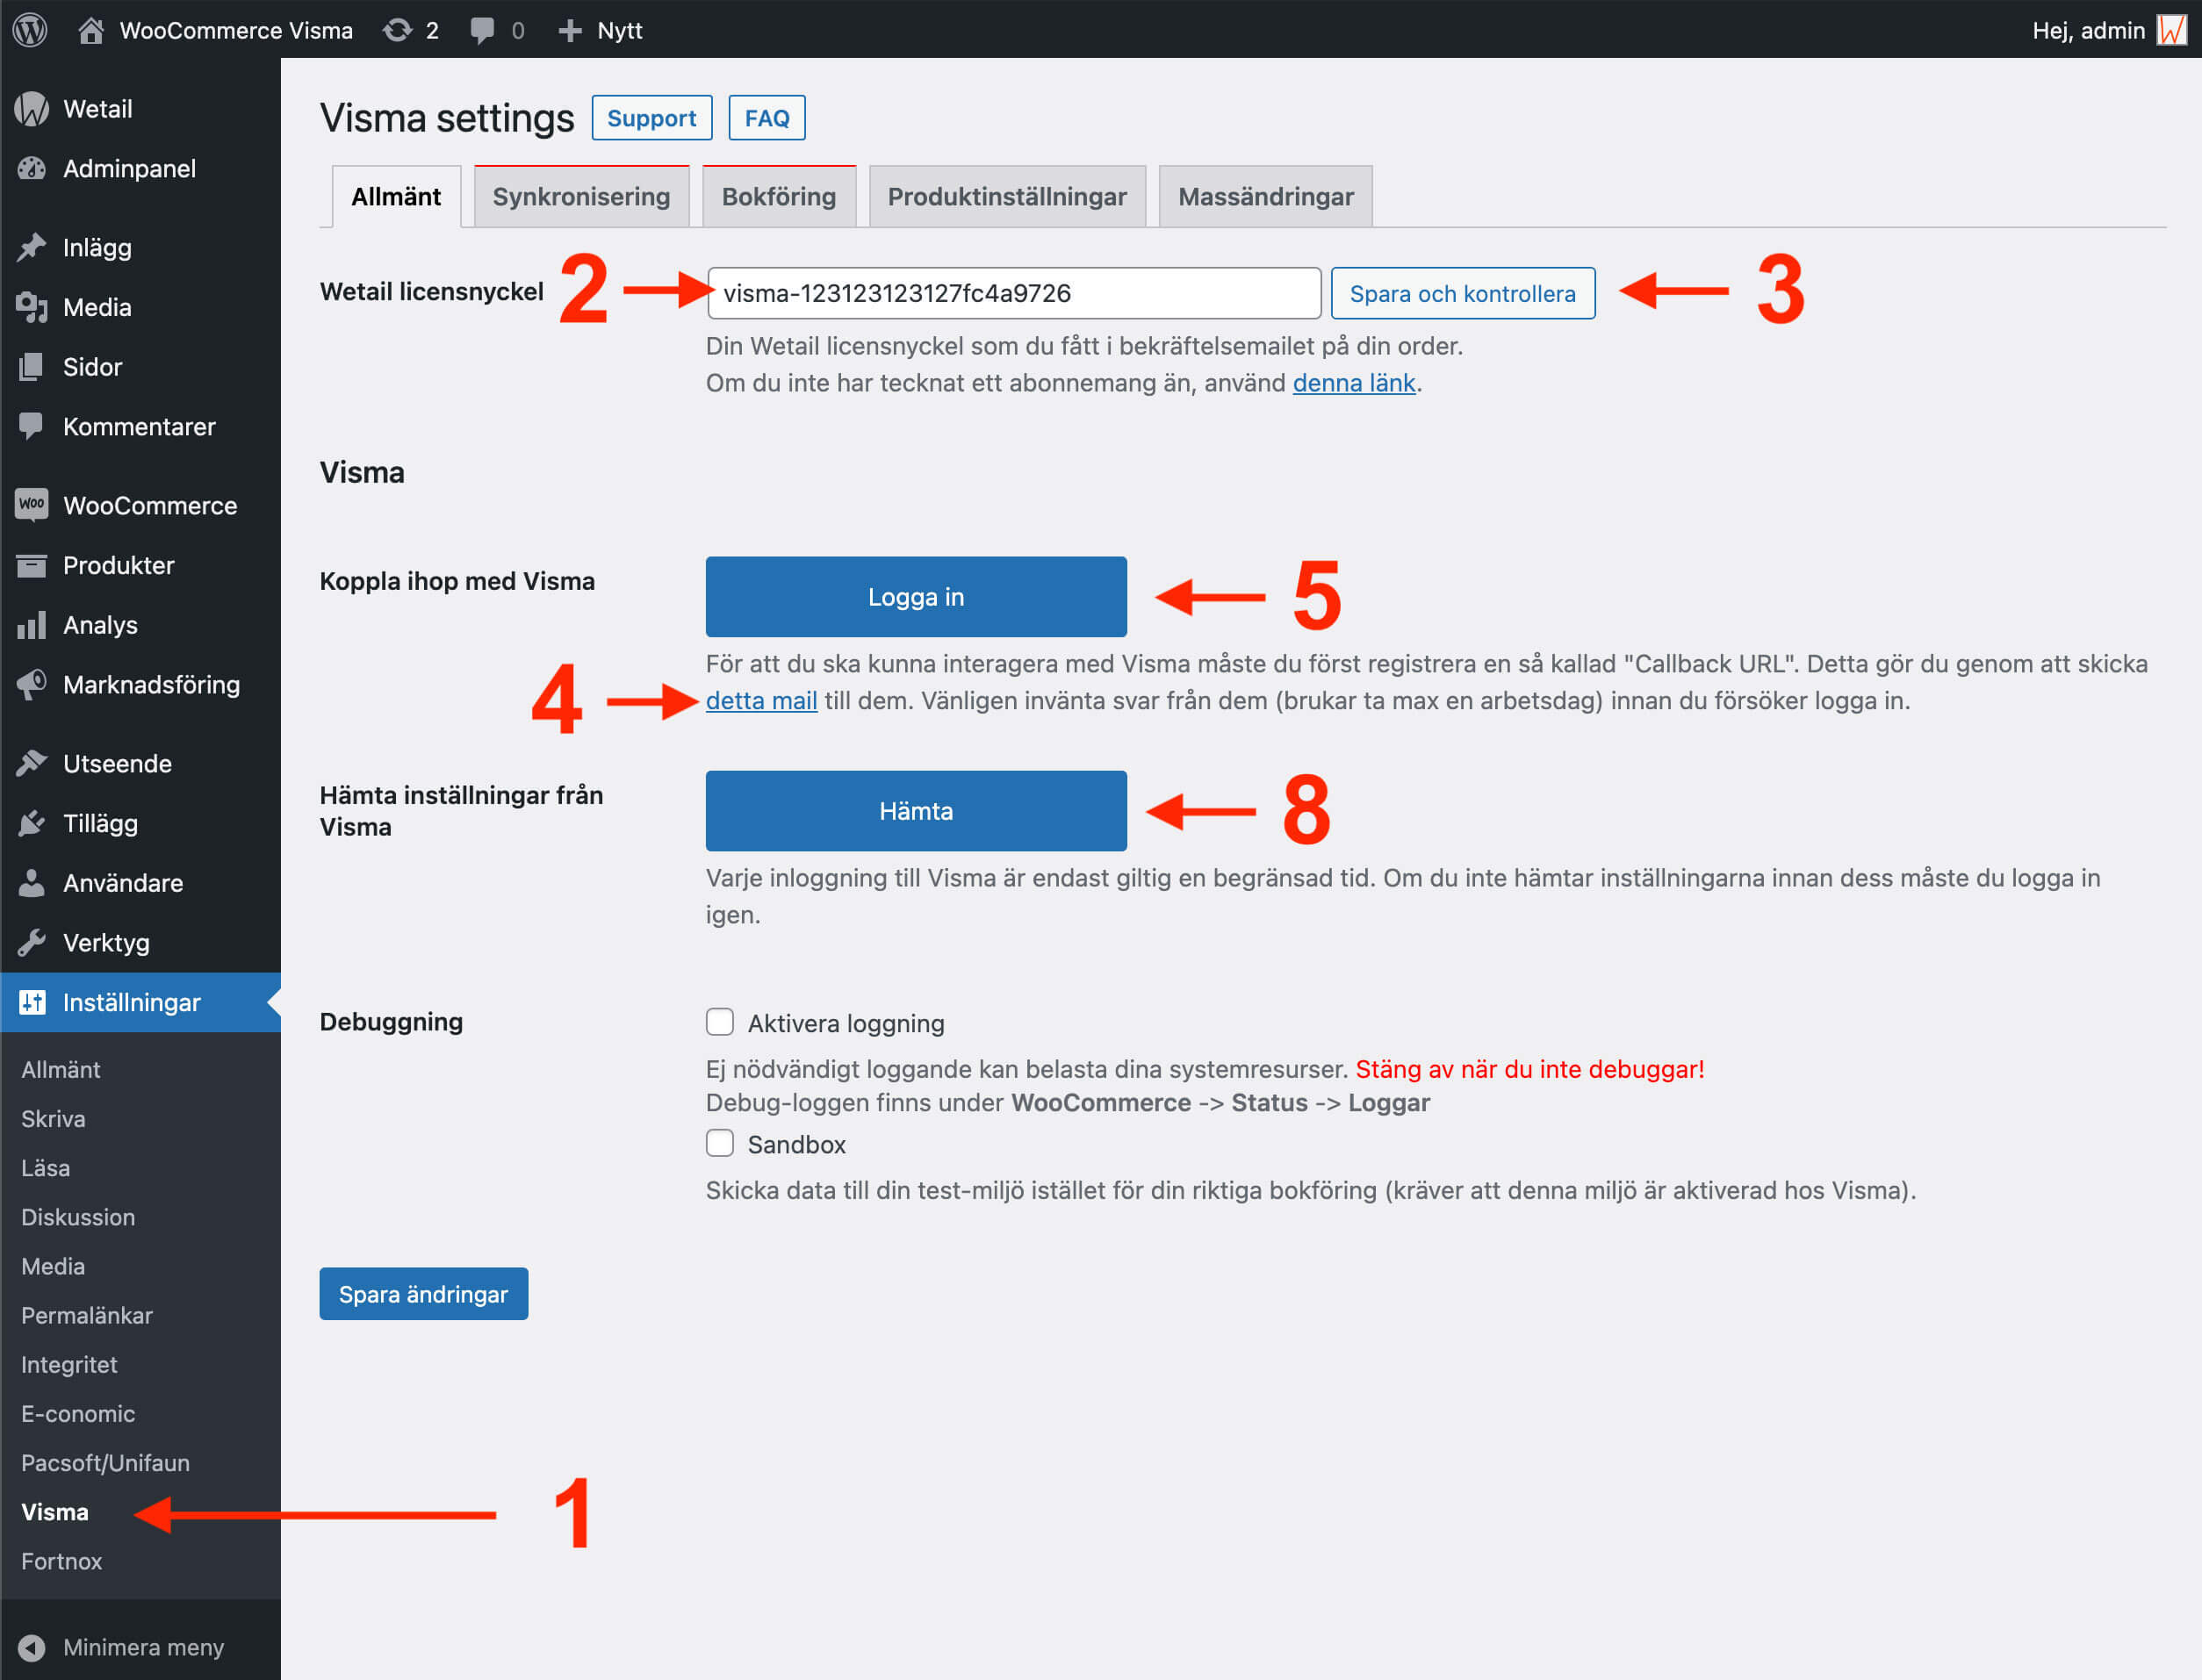
1. Go to Settings -> Visma in your WordPress admin
2. Enter your API key in the License key field that you received in the welcome email.
3. Click Save and Check to save the key and ensure that you have entered it correctly. If you encounter problems at this step, please contact support and specify the license key you are trying to enter.
4. In order for you to be able to interact with Visma, you must first register a so-called ”Callback URL” which you order by clicking on the link in this step. Please wait for a response from them (usually takes a maximum of one business day) before attempting to log in.
Also check that you have Visma’s integration module activated, which you do according to the following instructions.
5. When you have received an email from Visma that your webshop has been registered, you are ready to log in to Visma and approve the connection.
Click on Log in
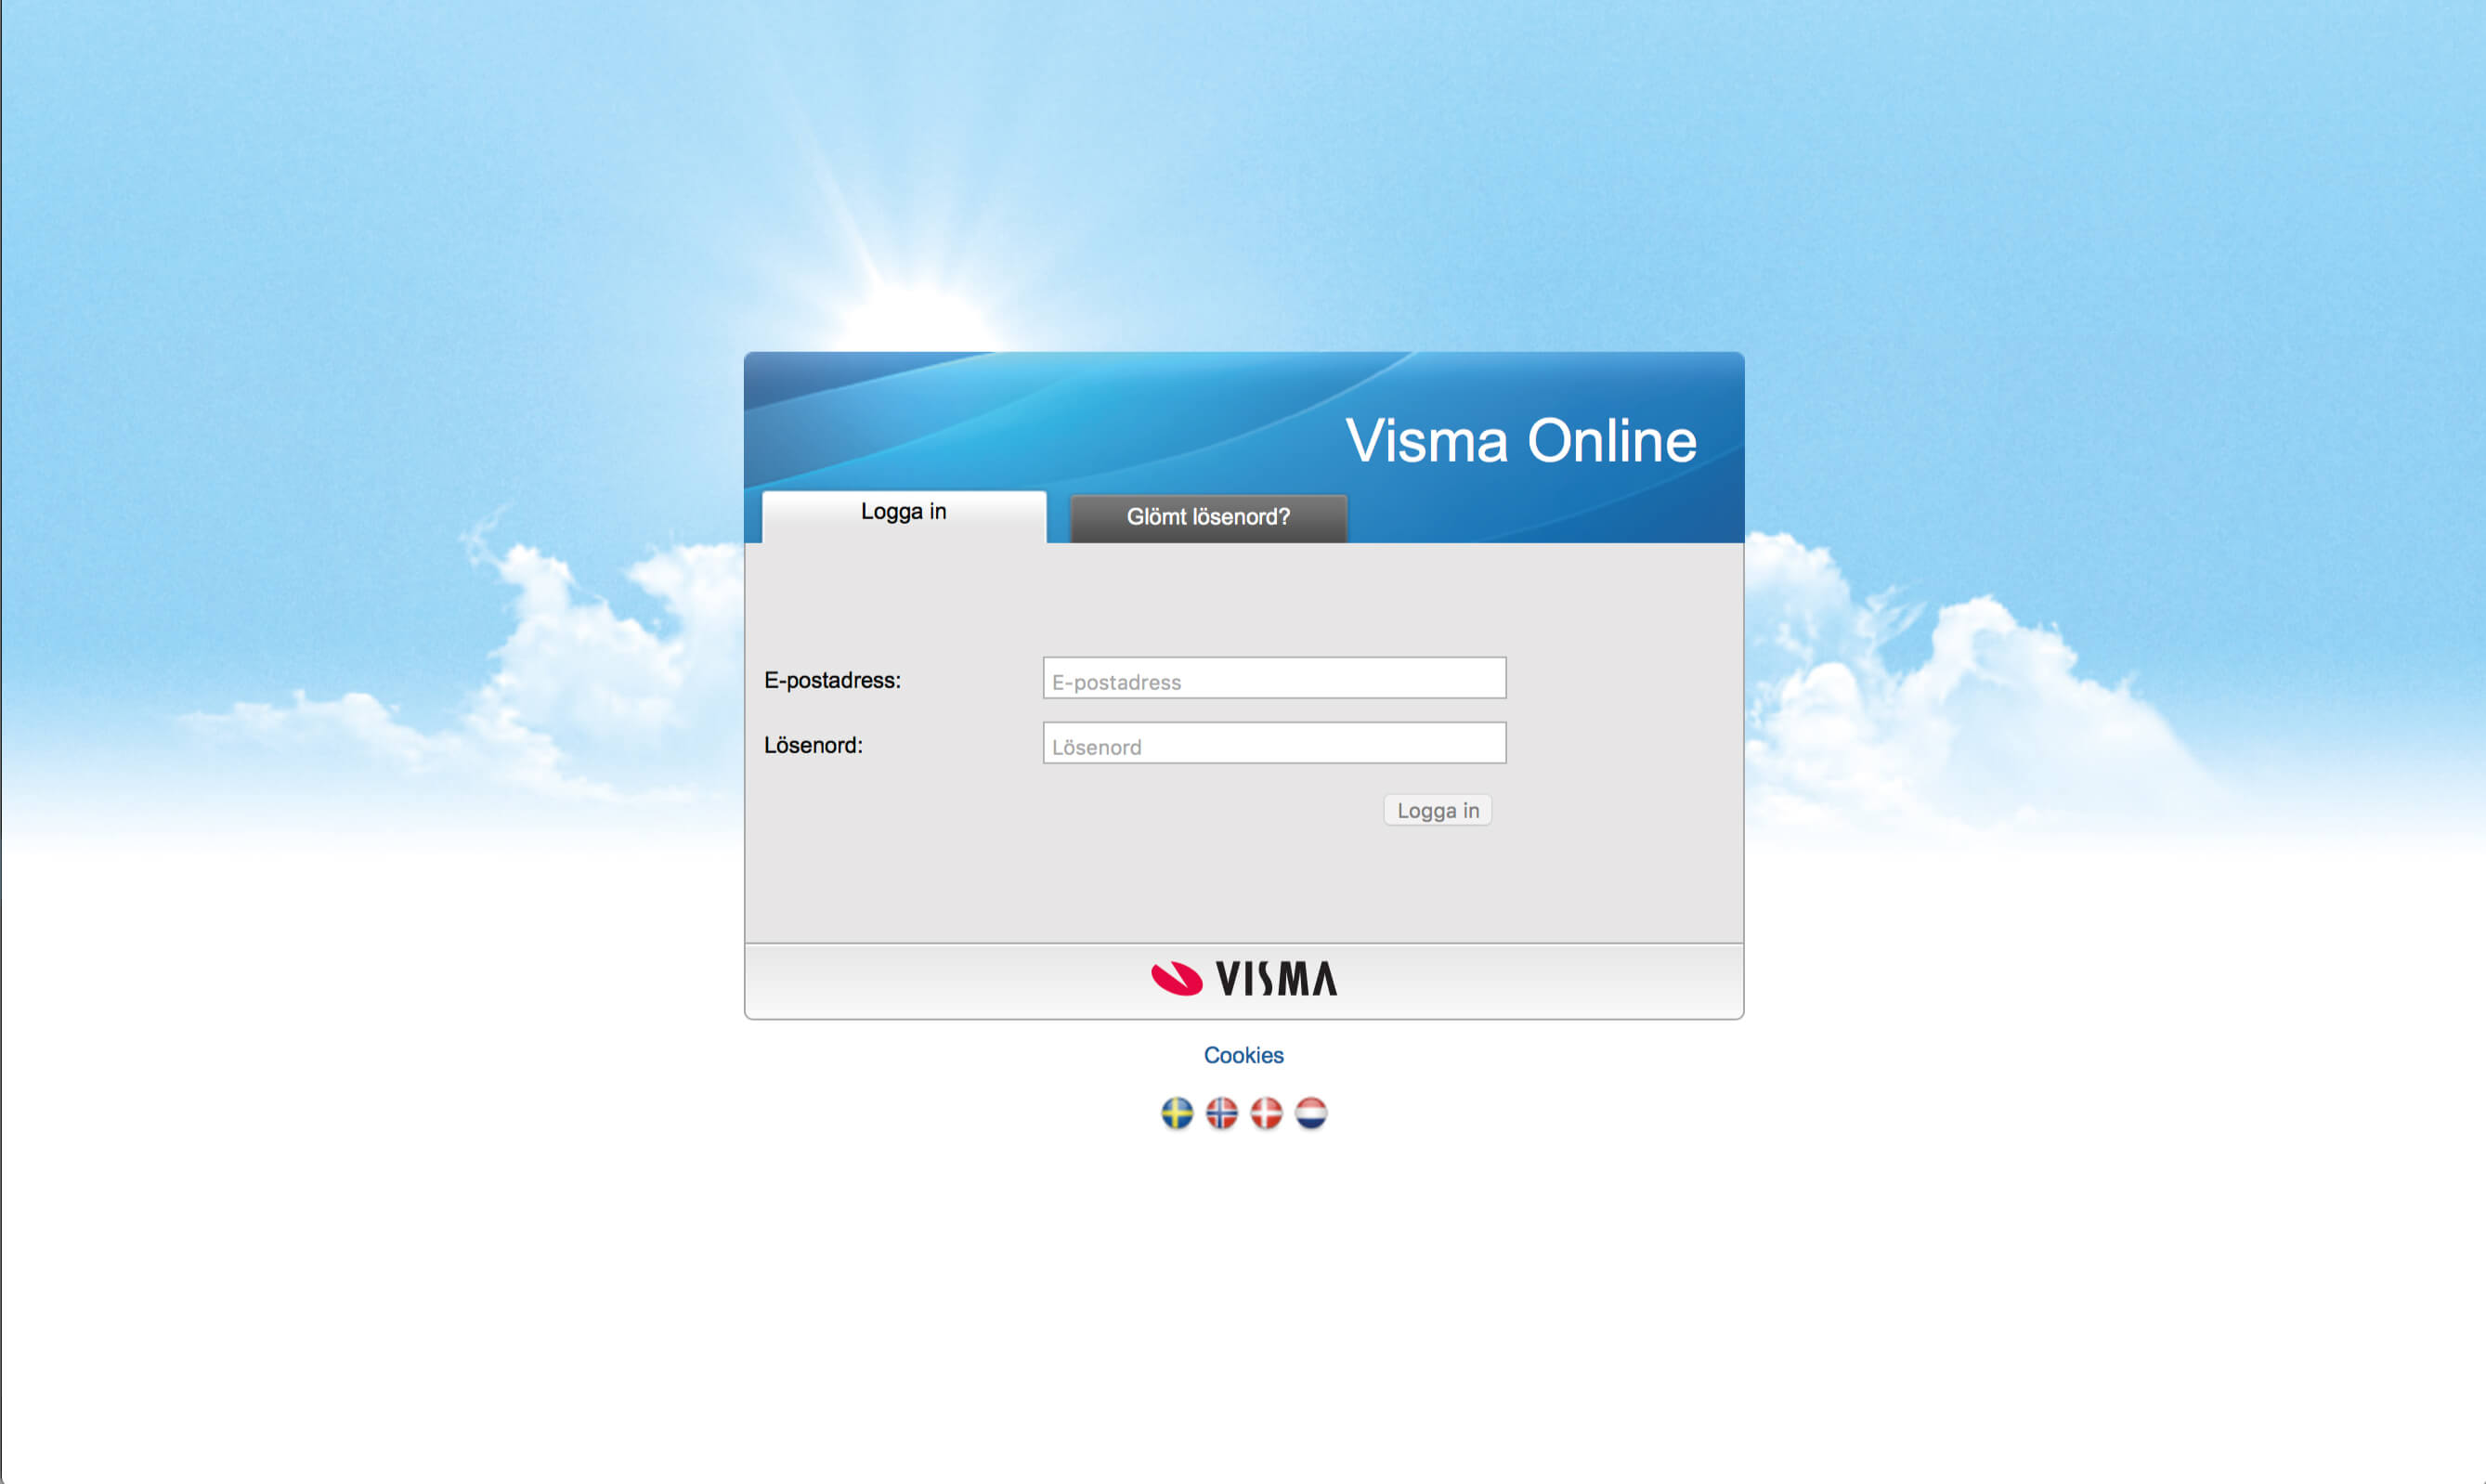
6. You will now need to log in to Visma Online. Here you enter your login details for Visma Online.
If you do not get a login window, you need to ensure that your browser allows pop-ups. Also check that the site url uses https and not http.
7. After that, you must give the connection rights to access data from Visma. Click Yes, Allow.
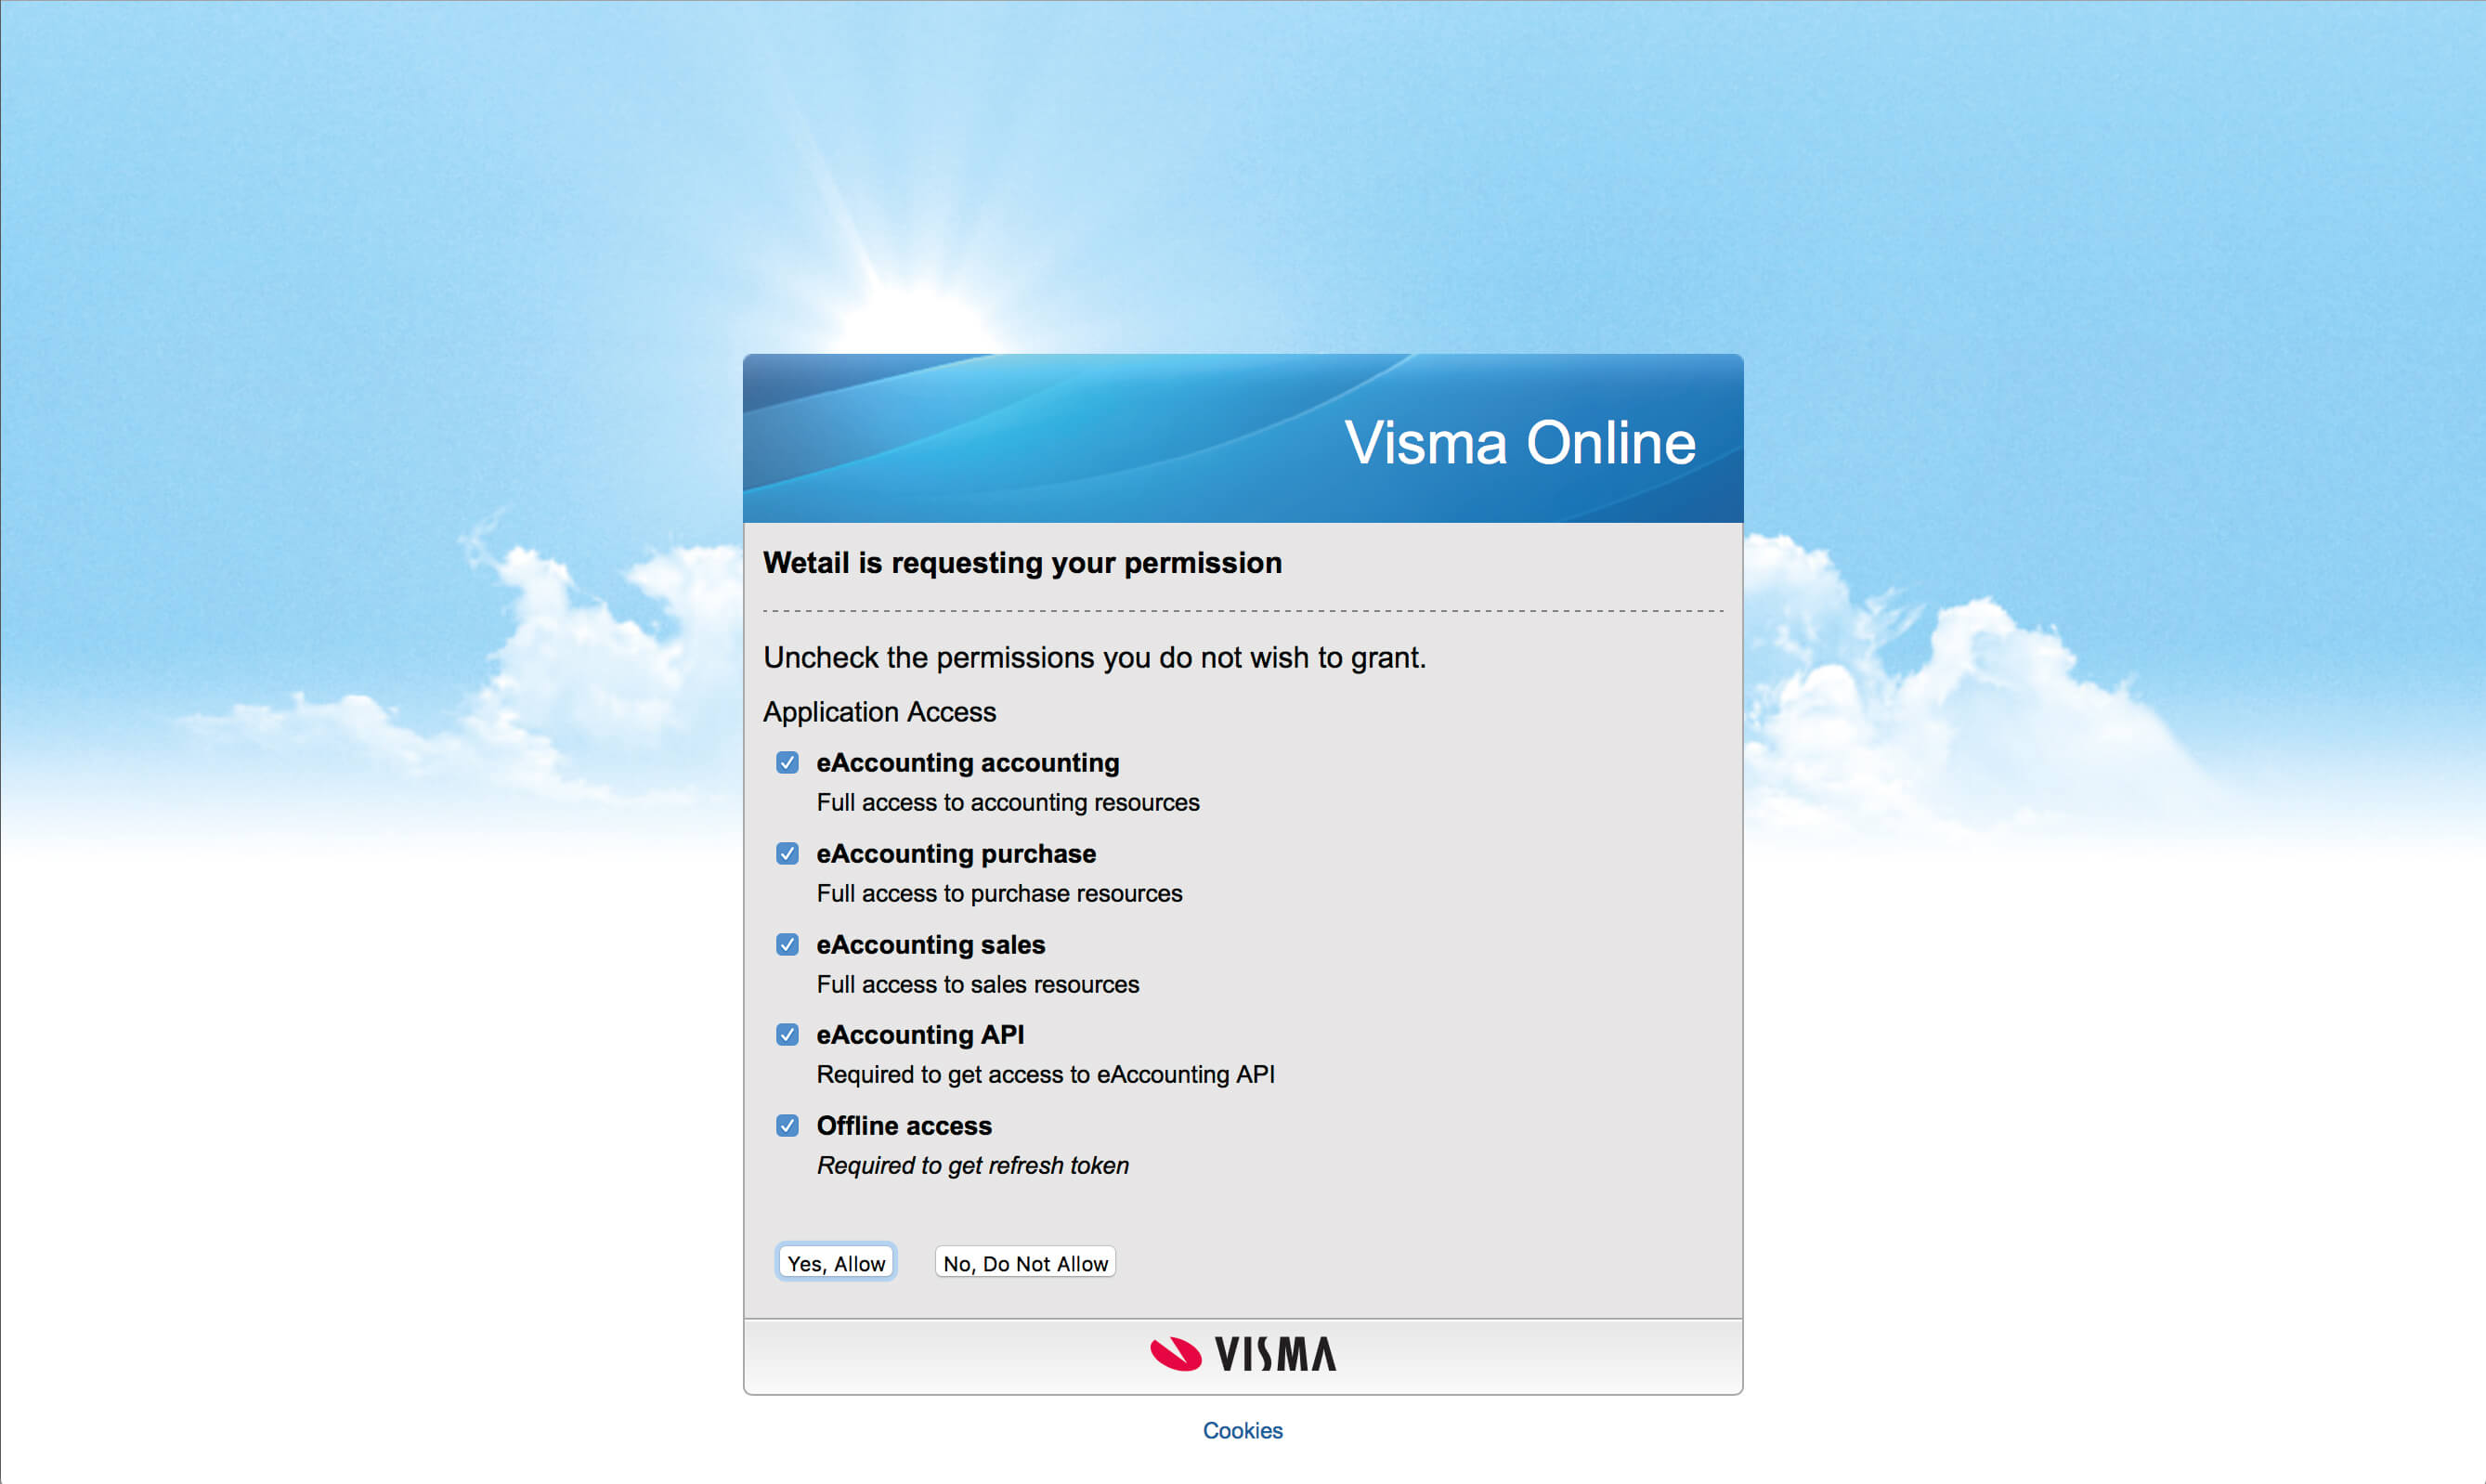
8. When your modules are approved, your webshop is connected to Visma and you are ready to download settings from Visma. Click the Download button.
Please note that a login is only valid for a limited time. If you encounter problems in this step, please log in again according to step 5.
Click the Save Changes button before proceeding to the next step.
Step 2. Choose how you want to sync orders
9. Go to the Sync tab
Here you specify how each payment method is to be handled and in which order status it is sent to Visma. There are two different flows to choose from:
- You create accounting verifications in Visma directly.
- You create orders in Visma that become the basis for an invoice that is then posted. (requires the order module)
Method 1. If you choose to post directly
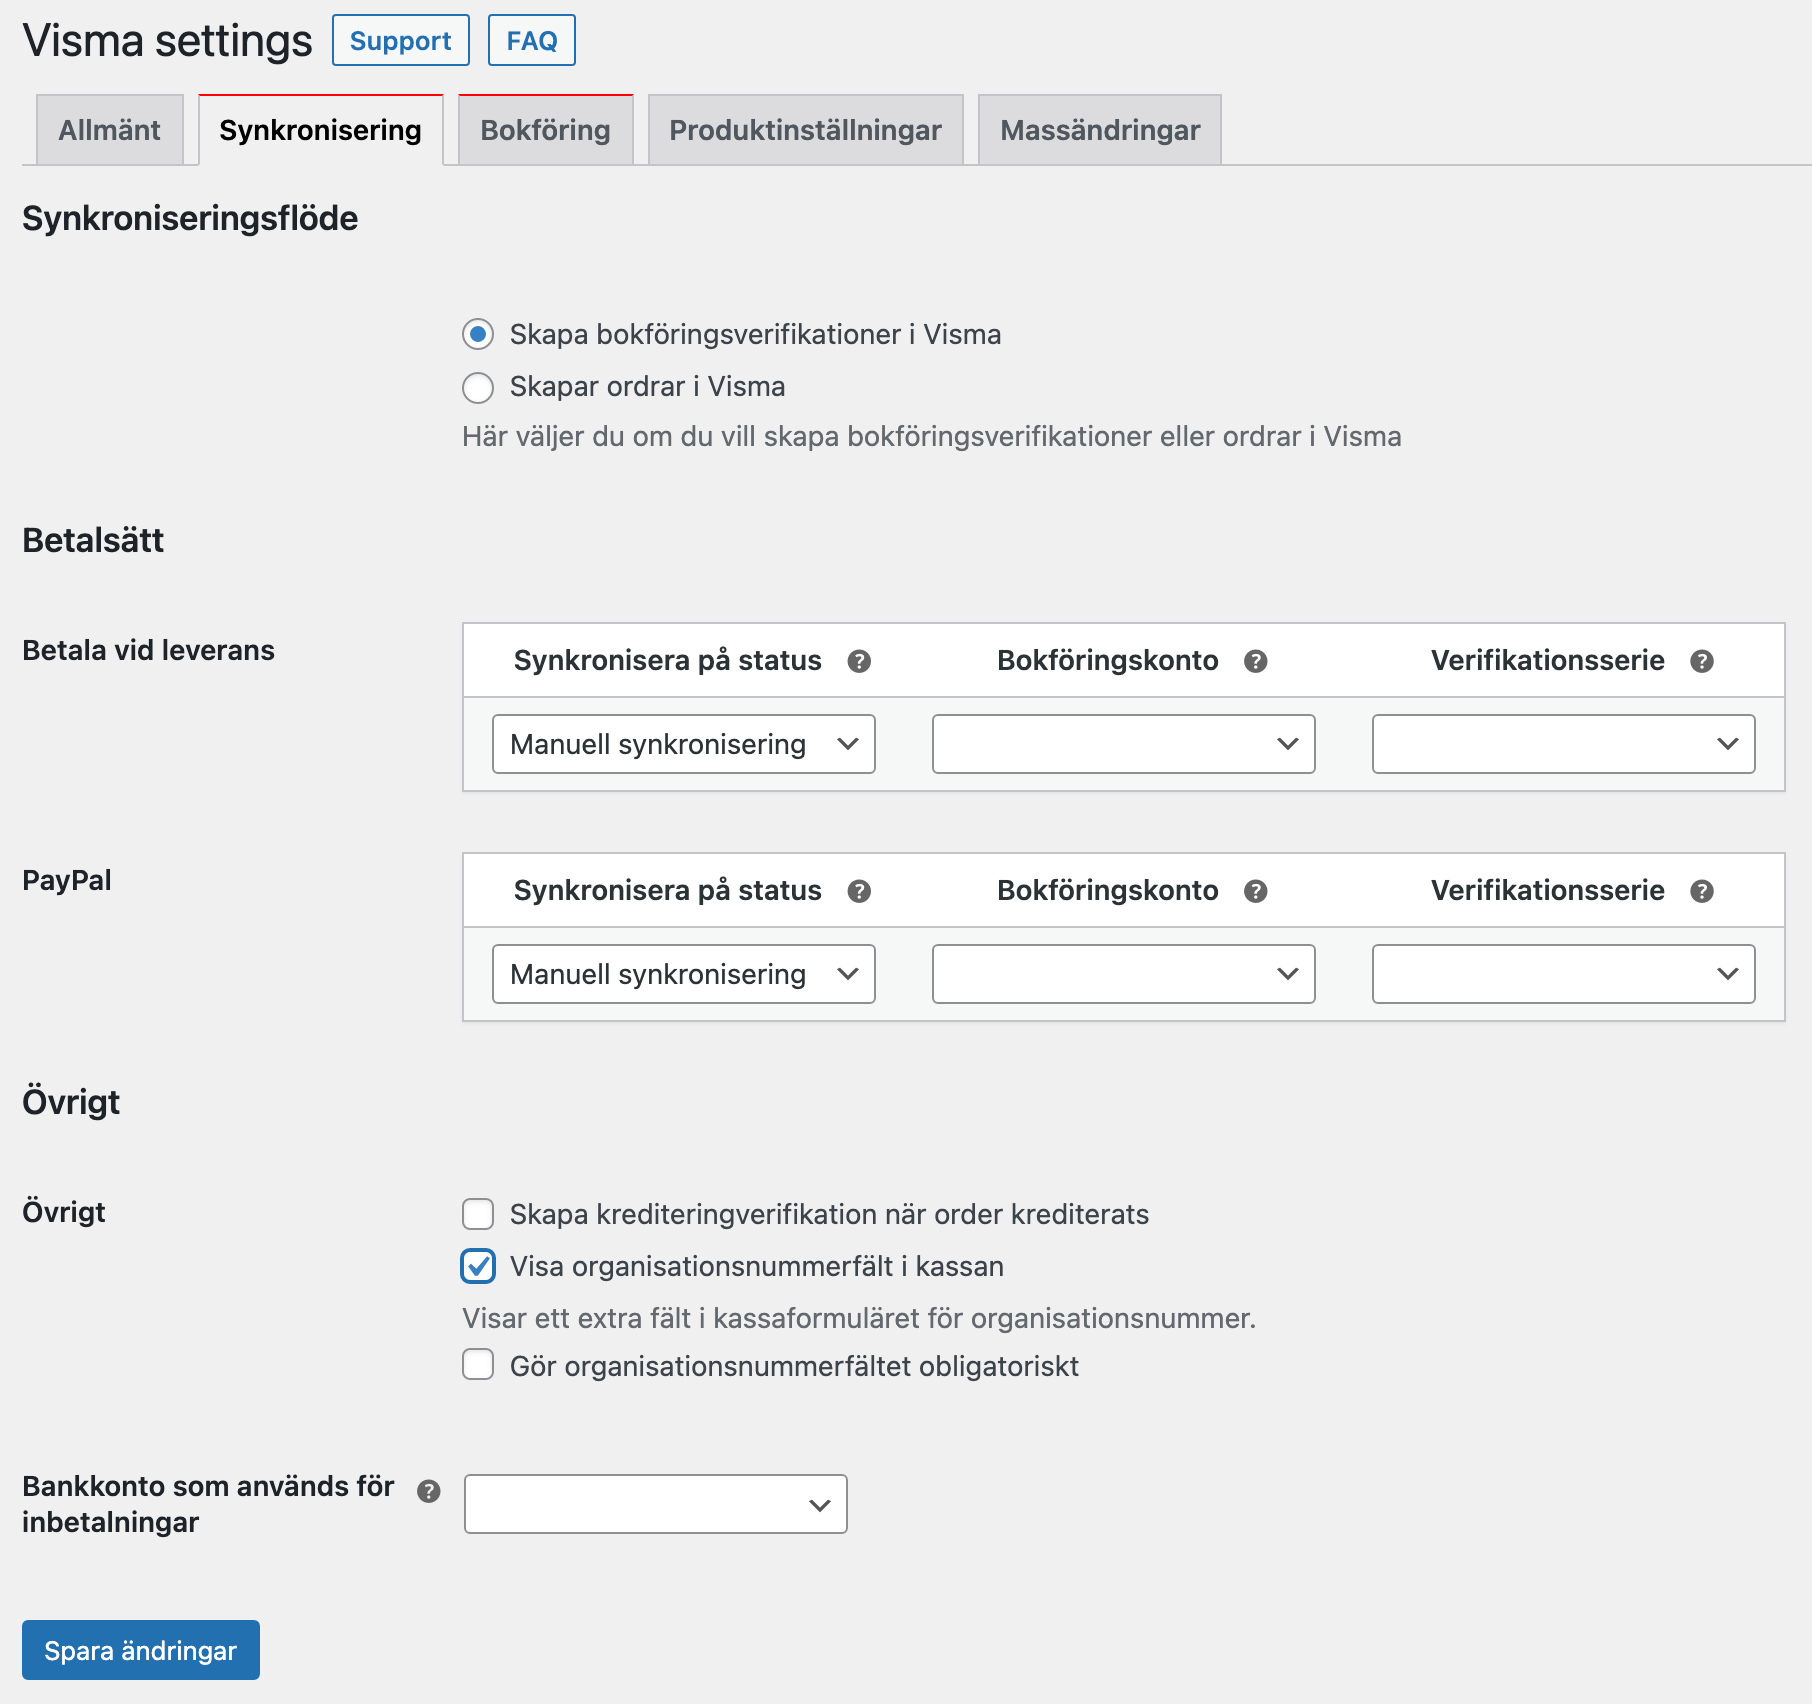
| Sync on status | Select an order status that you want to initiate a sync of the order. Note that this does not affect orders that already have this status, these must be synchronized manually. If you do not select a status here, no automatic synchronization will occur, only manual synchronization is possible. |
| Accounting account | Select the accounting account you want the order to be posted against when it is marked as paid. |
| Verification series | Select the series in which the voucher should be posted. You can also choose not to post the voucher at all. |
An order from WooCommerce is posted as below:
| Konto | Debet | Kredit |
| Revenue account | Price excl. VAT | |
| VAT account | VAT | |
| Accounting account | Total |
Method 2. If you choose to create orders
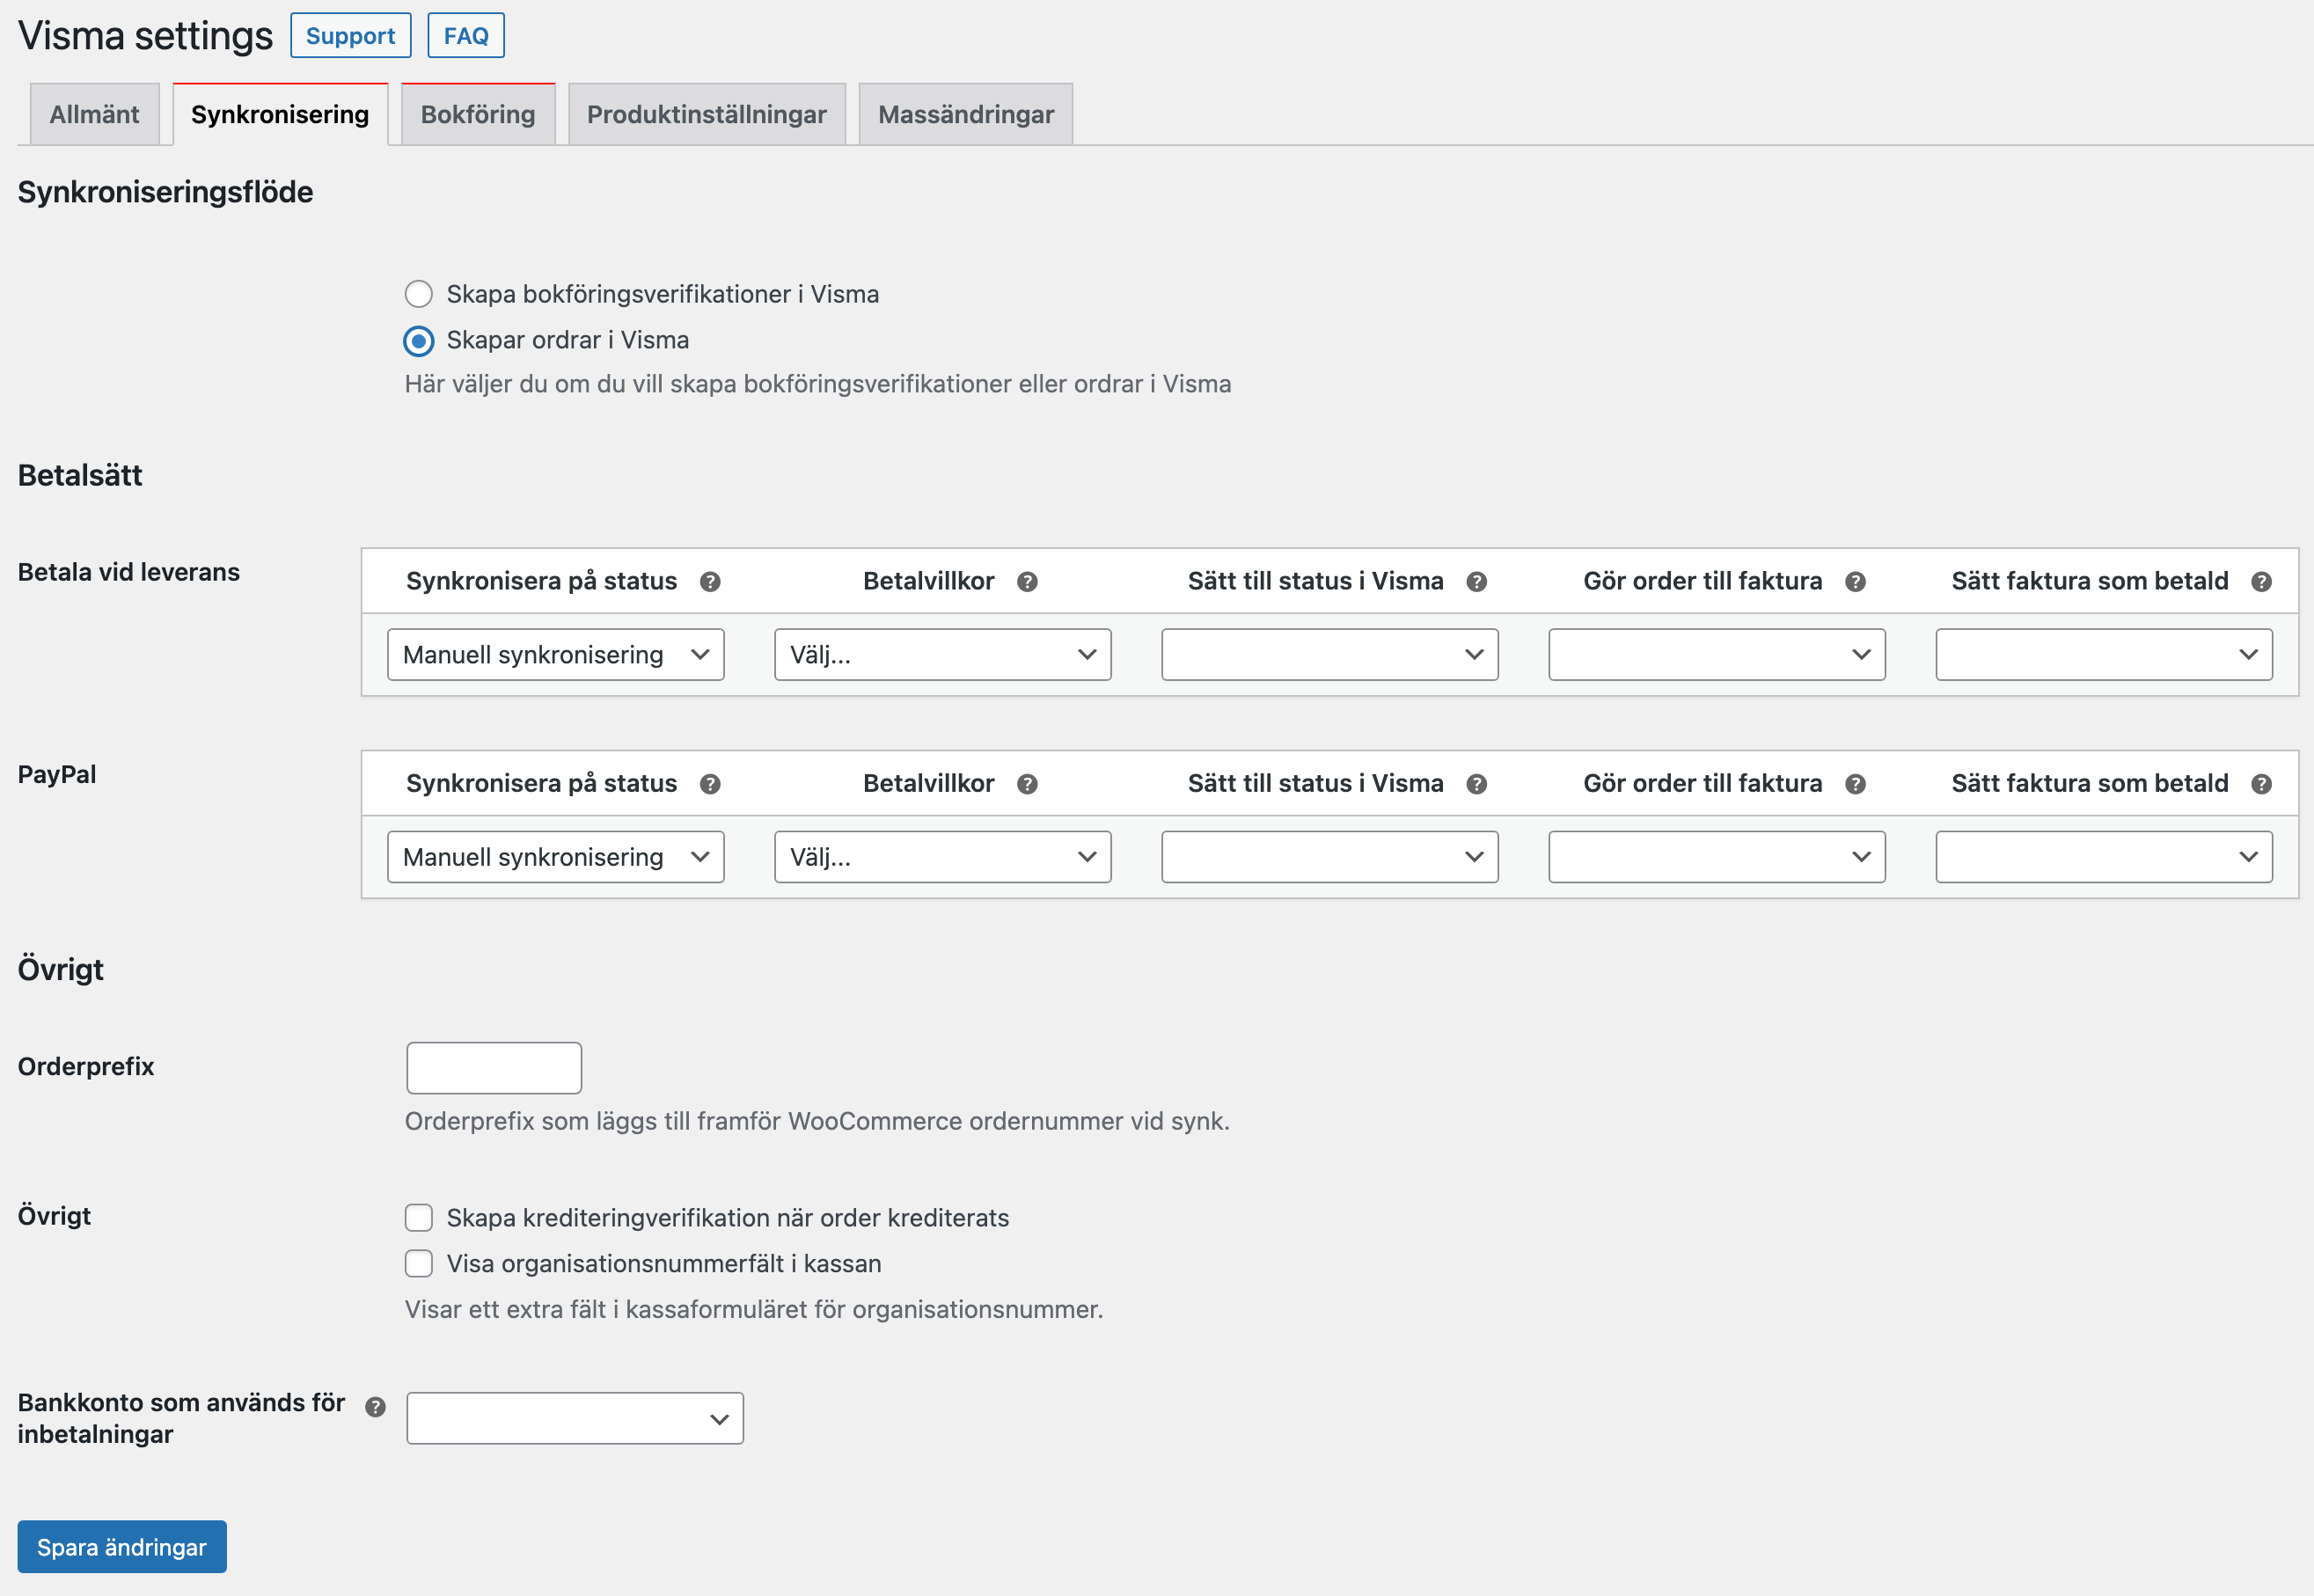
| Sync on status | Select an order status that you want to initiate a sync of the order. Note that this does not affect orders that already have this status, these must be synchronized manually. If you do not select a status here, no automatic synchronization will occur, only manual synchronization is possible. |
| Payment terms | Select the payment terms that should apply to the issued invoice. |
| Change to status in Visma | Select the status to which the order should be set in Visma. |
| Turn order into invoice | Convert order to invoice. Requires that the order has the status sent. |
| Mark invoice as paid | You can choose to automatically register a full deposit to the account listed below under ”Bank account used for deposits”. |
Other settings
| Create crediting verification when orders are credited | If you create a return in WooCommerce, create a credit in Visma. |
| Order Prefix (method 2 only) | The value you fill in is set as an offset to your word numbers in WooCommerce. Prevents order numbers from clashing with orders created in Visma. |
| Show organization number field at checkout | Adds a field for Organization number in the checkout which synchronizes to the customer card in Visma. Suitable for stores that have high B2B sales. You can choose whether this is a mandatory field or not. |
| Bank account used for payments | Select the accounting account you want the order to be posted against when it is marked as paid. |
Click the Save Changes button before proceeding to the next step.
Steg 3. Accounting settings
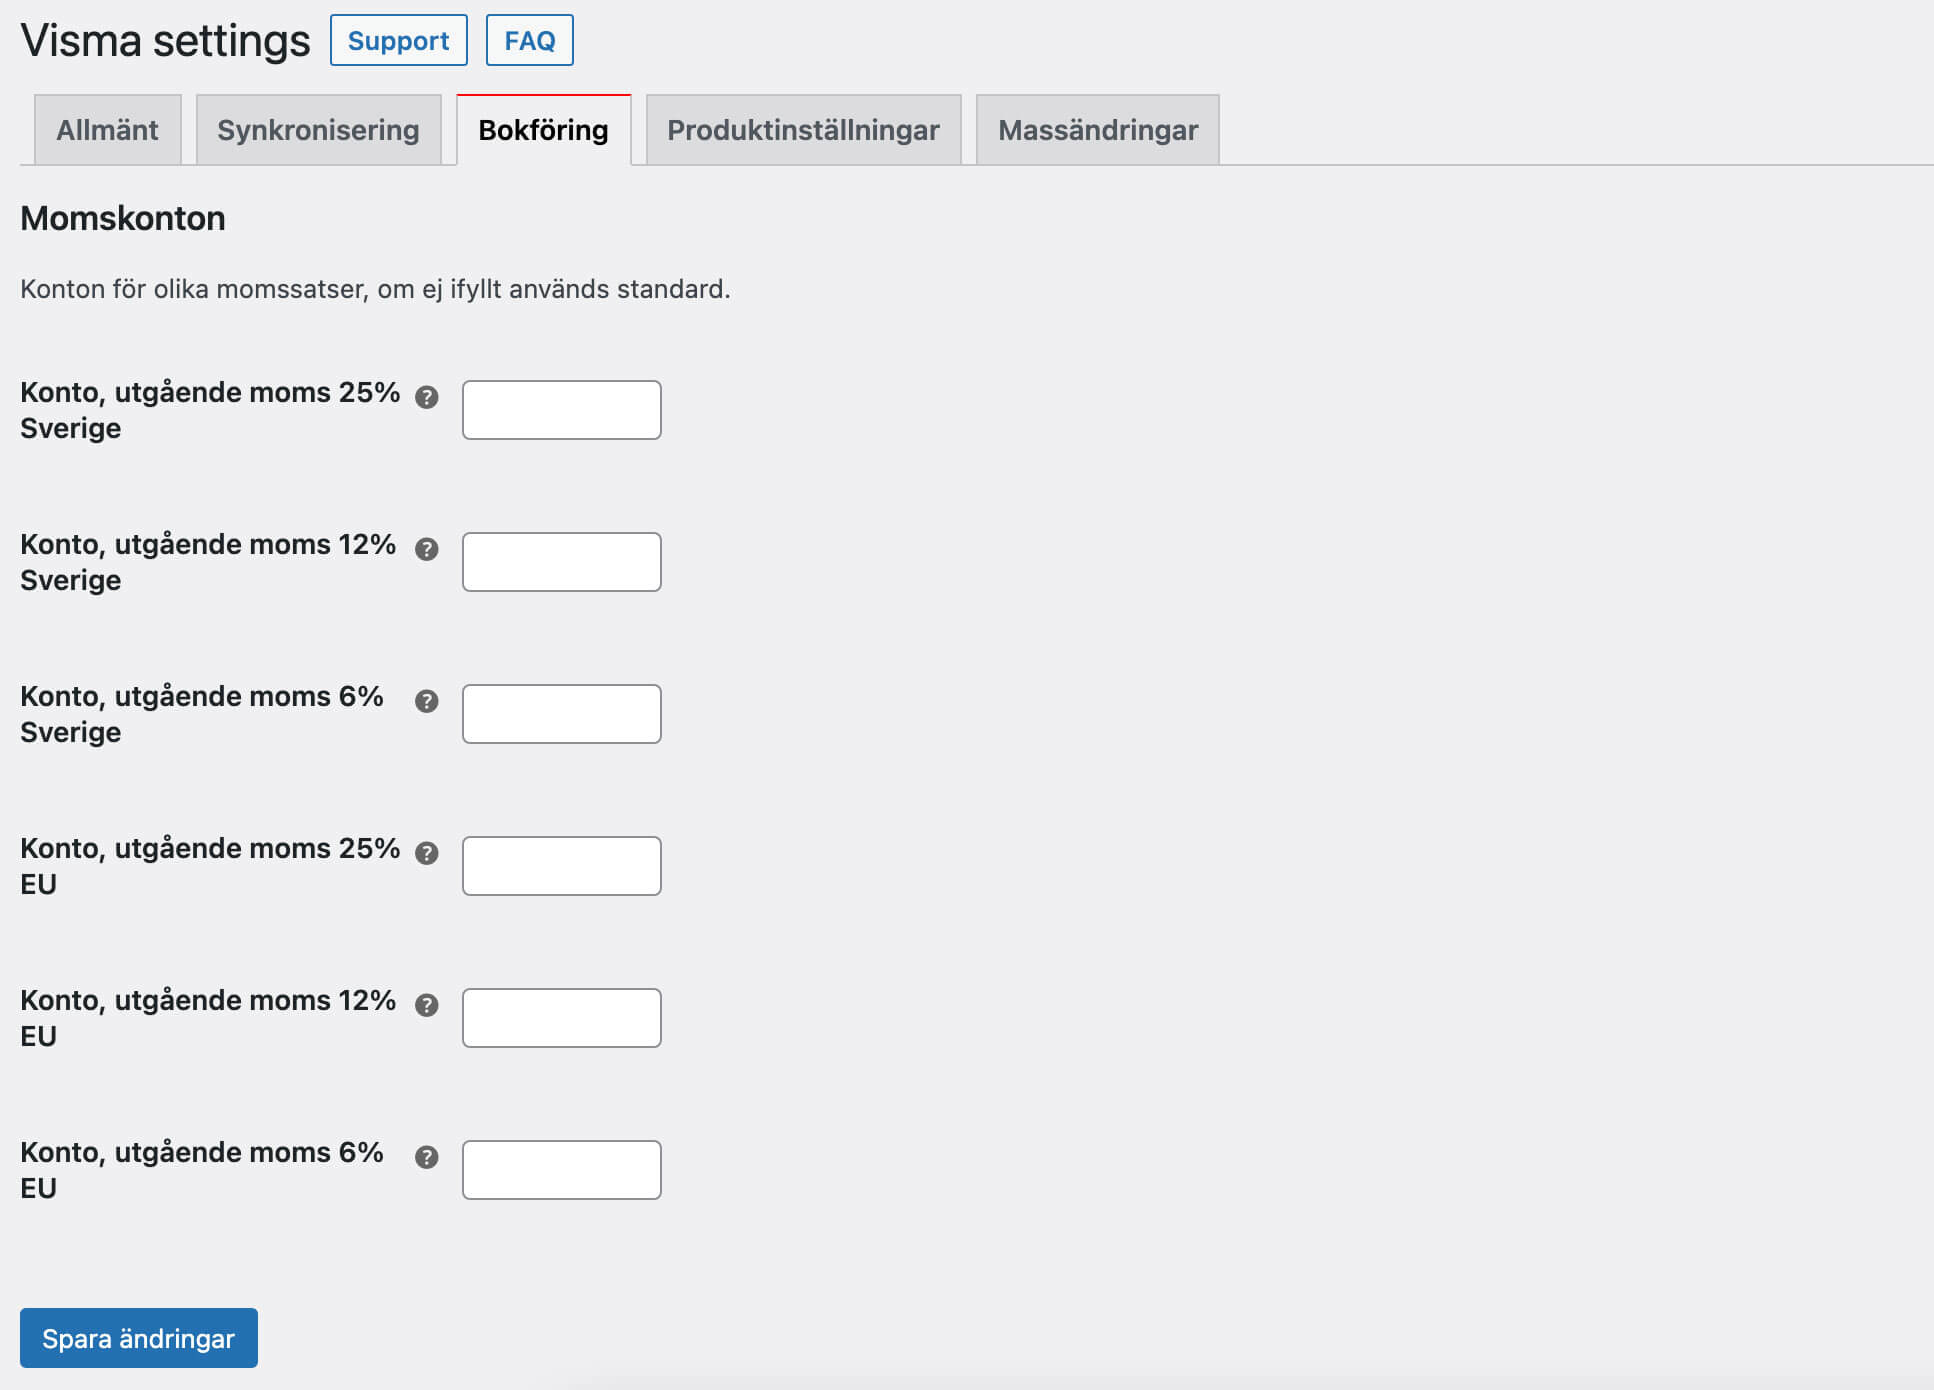
10. Go to the Accounting tab
Enter the VAT accounts you use.
- If you only sell products with 25% VAT, you only need Account, outgoing VAT 25% Sweden.
- If you sell products with 12% VAT enter Account, outgoing VAT 12% Sweden.
- If you sell products with 6% VAT enter Account, outgoing VAT 6% Sweden.
- If you sell to the EU, enter the VAT accounts you use for EU sales.
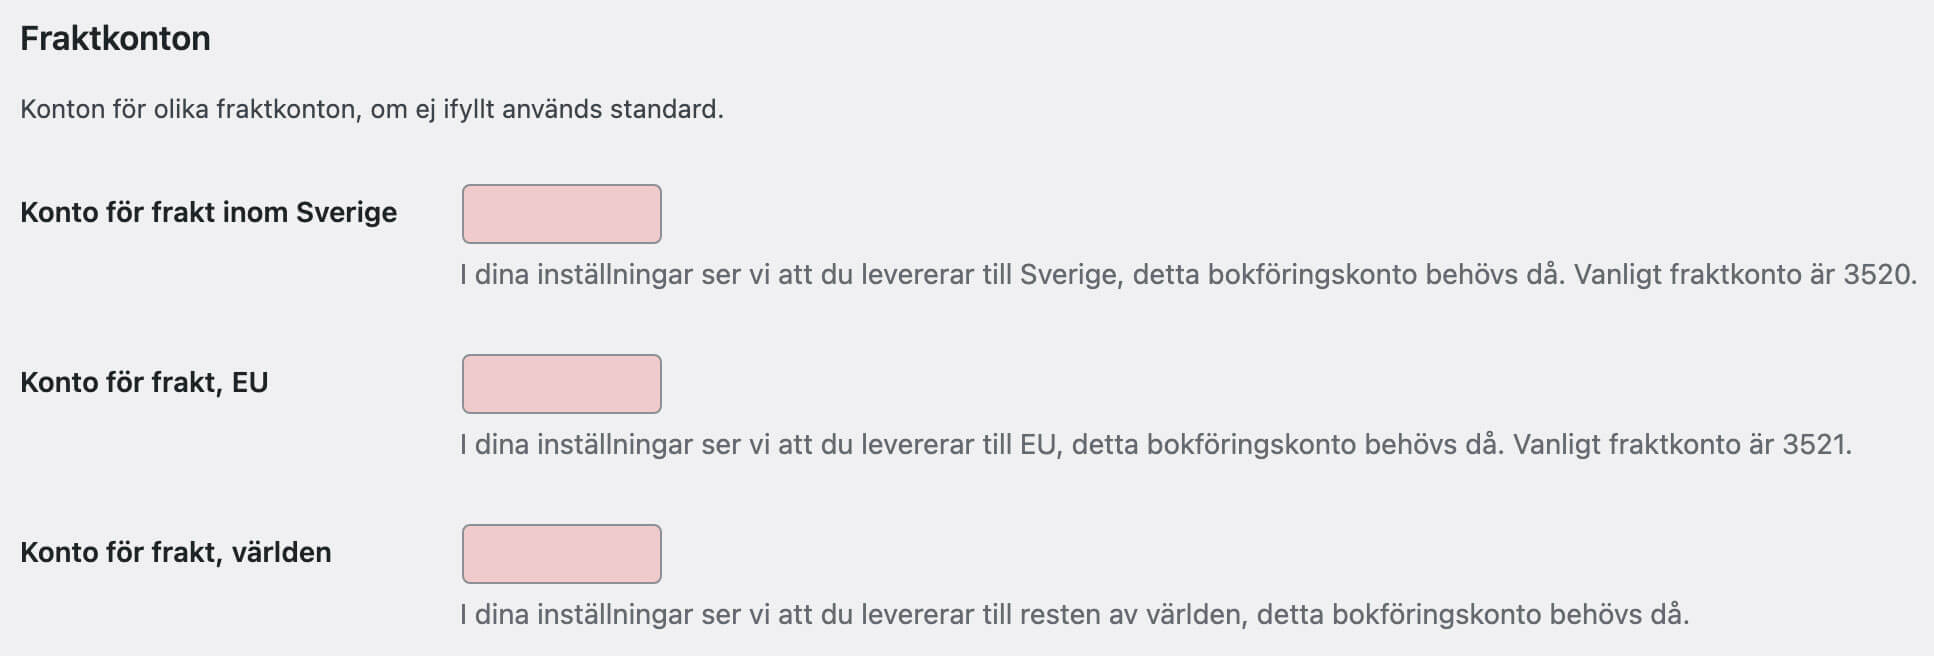
Shipping
If you have chosen Method 1, a section for managing shipping will be added. Fill in current accounts for the shipping options that appear.
Click the Save Changes button before proceeding to the next step.
Steg 4. Product settings
11. Go to the Product Settings tab.
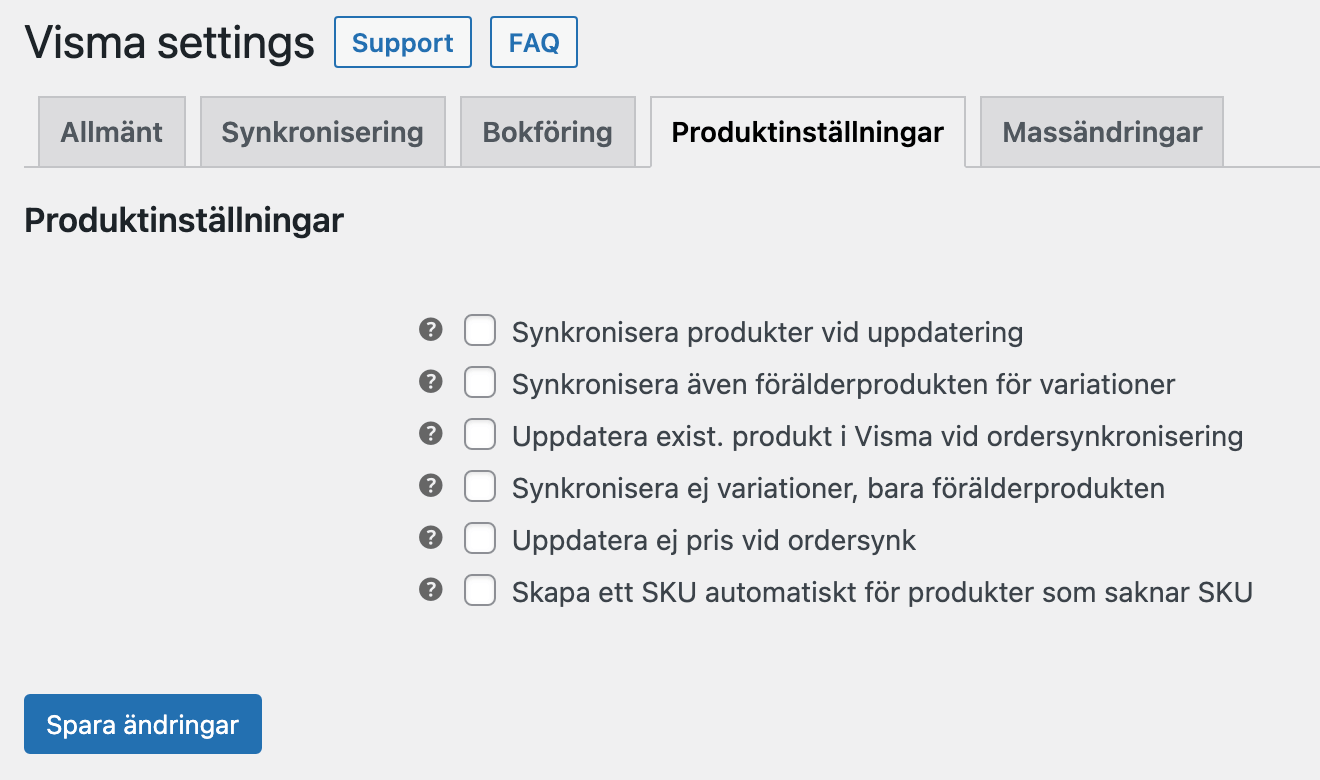
| Synchronise products when updating | Anytime a product is changed in the WooCommerce product view, the change will be reflected in Visma. If you have inventory sync from a 3PL, we advise against using this setting. |
| Also synchronise the parent product for variations | When this option is selected, the parent product of a variation will also be synchronized, even if it is not in Visma initially. |
| Update existing product in Visma during order synchronisation | You can choose to update the product(s) included in an order when it is synchronized. |
| Do not sync variations, only the parent product | A product with variations also contains a so-called parent product (Master product). This is not a product in itself but only a collection product for your variations. It is thus the product page for your e.g. sizes or color choices.
When this option is selected, only the parent product will sync. By default, this setting is not activated. |
| Do not update price during order synchronisation | Normally, a price update in WooCommerce will also update the price in Visma. This setting will ignore price changes in WooCommerce (orders where the product price differs will however use the price from WooCommerce). |
| Create an SKU automatically for products that do not have an SKU | Articles in Visma require an article number. SKU is the unique identifier between WooCommerce and Visma to manage stock balance and create orders of your products.
If you are missing the SKU in WooCommerce, we recommend that you use this function or do it manually per article before synchronizing. If an order in WooCommerce contains products without item numbers, this option will ensure that an item number is generated based on their title. |
Click the Save Changes button before proceeding to the next step.
Options for bulk edits
This is not a required step, but this tab contains handy tools if you have large amounts of data you want to sync over
Go to the Bulk edit tab and choose from the following functions:
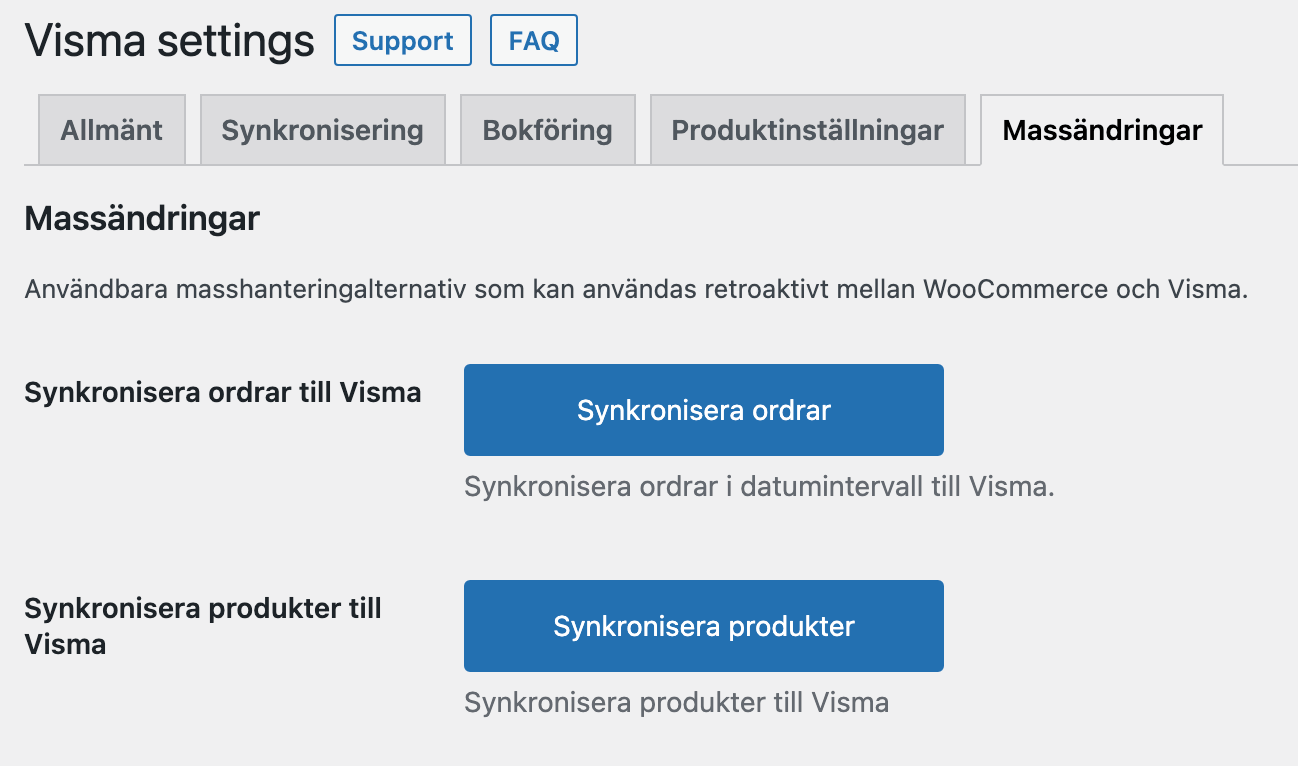
| Synchronise orders to Visma | Synchronise orders from a certain date range from WooCommerce to Visma. |
| Synchronise products to Visma | Synchronises all products in WooCommerce to Visma. |
Beställ Licens
Beställ din licens till Visma här
Support • Uppdateringar • Ingen bindningstid
Övriga tjänster
-
Utveckla er e-handel
Vi bygger allt från specialplugins till premium e-handelsplatser
-
Premium hosting
Med modern serverstruktur maxar du din e-handels hastighet
-
Komplexa integrationsflöden
Wetail iPaas aggregerar data och hanterar komplexa integrationer mellan flera olika system